Getting Started with PC Builder MW on Shopify
Adding an interactive PC builder to your Shopify store sounds complex — but with PC Builder MW, you can go live in under 5 minutes. This guide walks you through every step from installation to your first live widget.
Step 1: Install from the Shopify App Store
Head to the Shopify App Store and search for PC Builder MW. Click Add app and approve the permissions. The app needs access to your products and orders to power the configurator and track analytics.
Once installed, you'll see PC Builder MW in your Shopify sidebar under Apps.
Step 2: Create Your First Widget
Open the app and click Add Widget. Give it a name — for example, "Gaming PC Builder" or "Custom Workstation Builder." Each widget is a standalone configurator that you can embed anywhere on your store.
You can create multiple widgets for different use cases: one for gaming builds, one for office setups, one for budget builds.
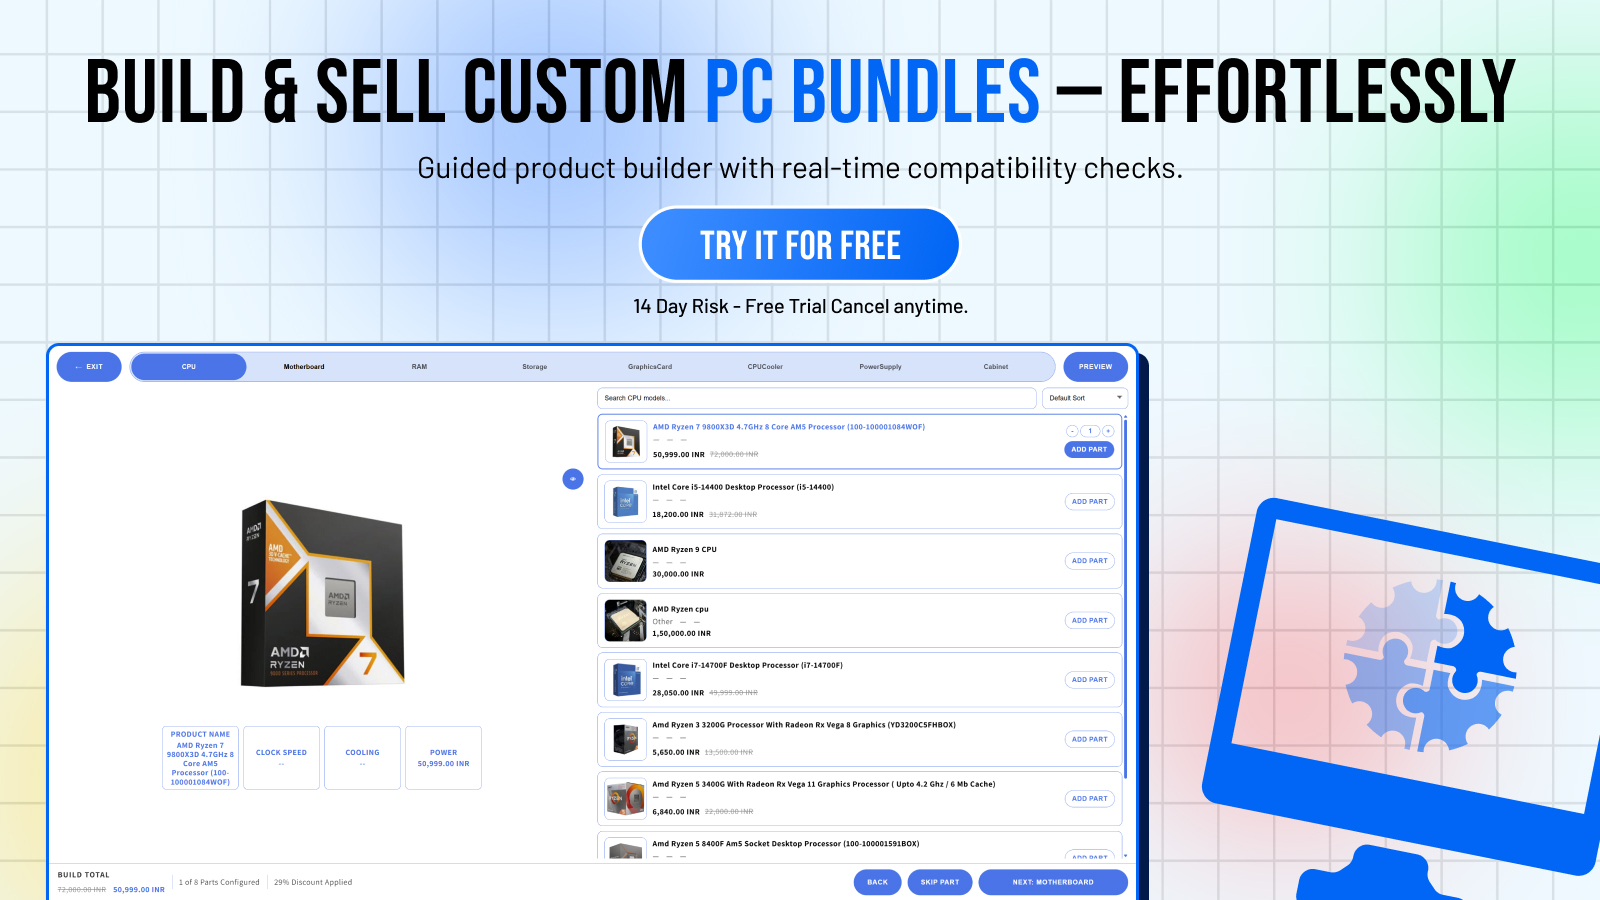
Step 3: Set Up Your Component Categories
PC Builder MW uses a step-based configurator. Each step represents a component category — CPU, GPU, RAM, Storage, Case, Cooling, PSU. You can:
- Add as many steps as you need
- Rename steps to match your catalog
- Reorder steps with drag-and-drop
- Mark steps as required or optional
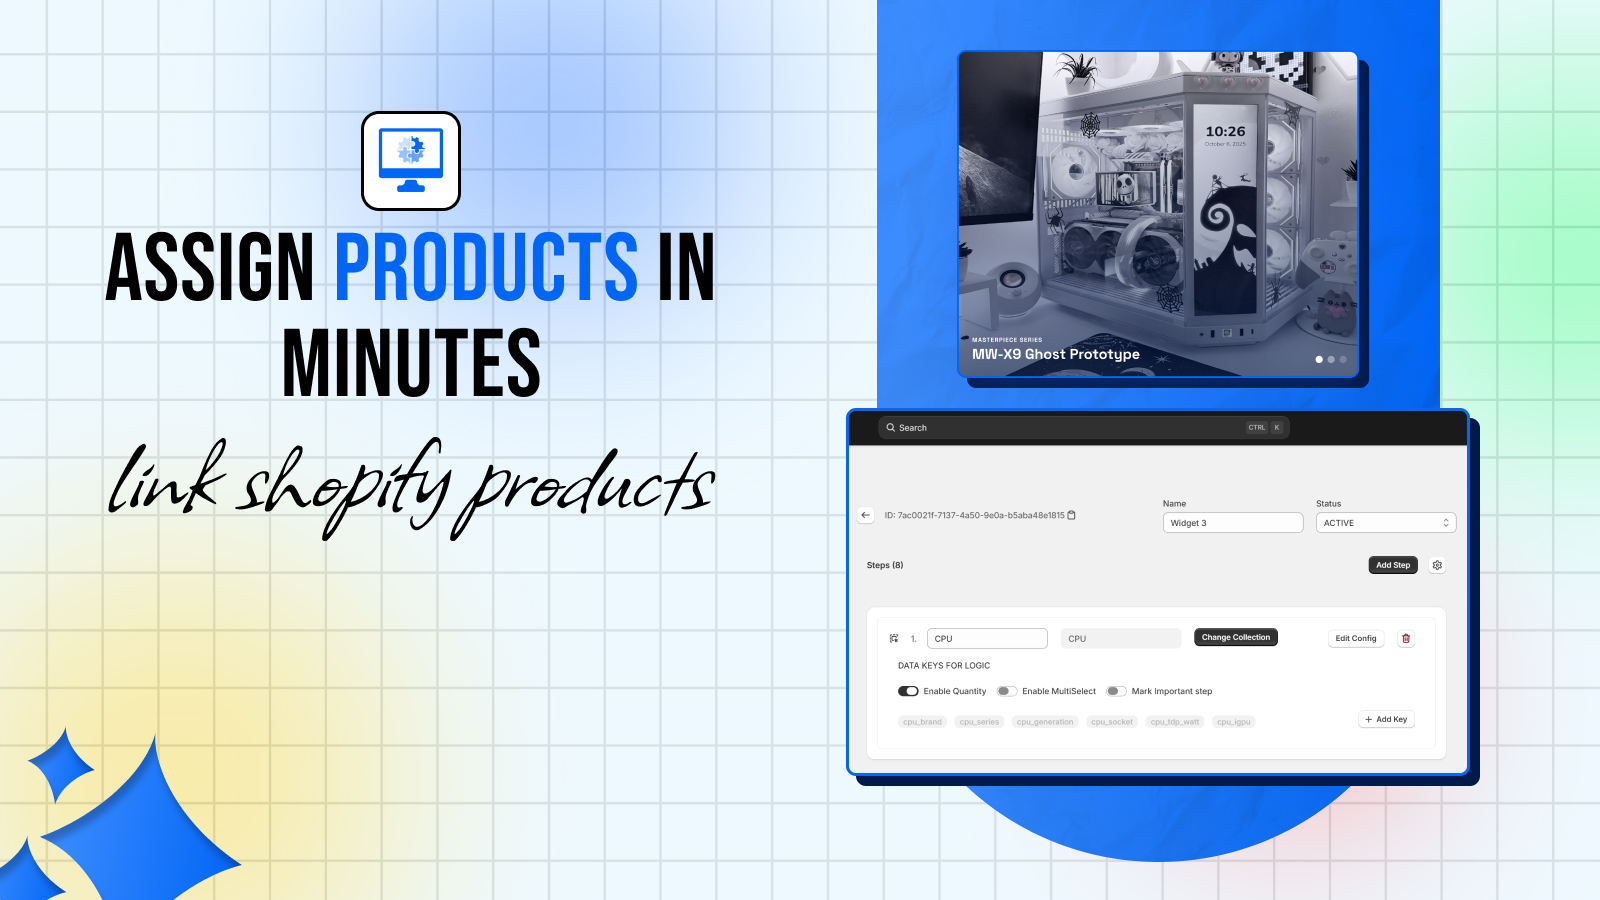
Step 4: Assign Your Shopify Products
This is where the magic happens. For each step, you assign the relevant products from your Shopify catalog. The app syncs your product list in real-time — prices, stock levels, and product status all update automatically.
You can assign products individually or use CSV import to bulk-assign hundreds of products at once. The CSV import is especially useful if you have a large catalog.
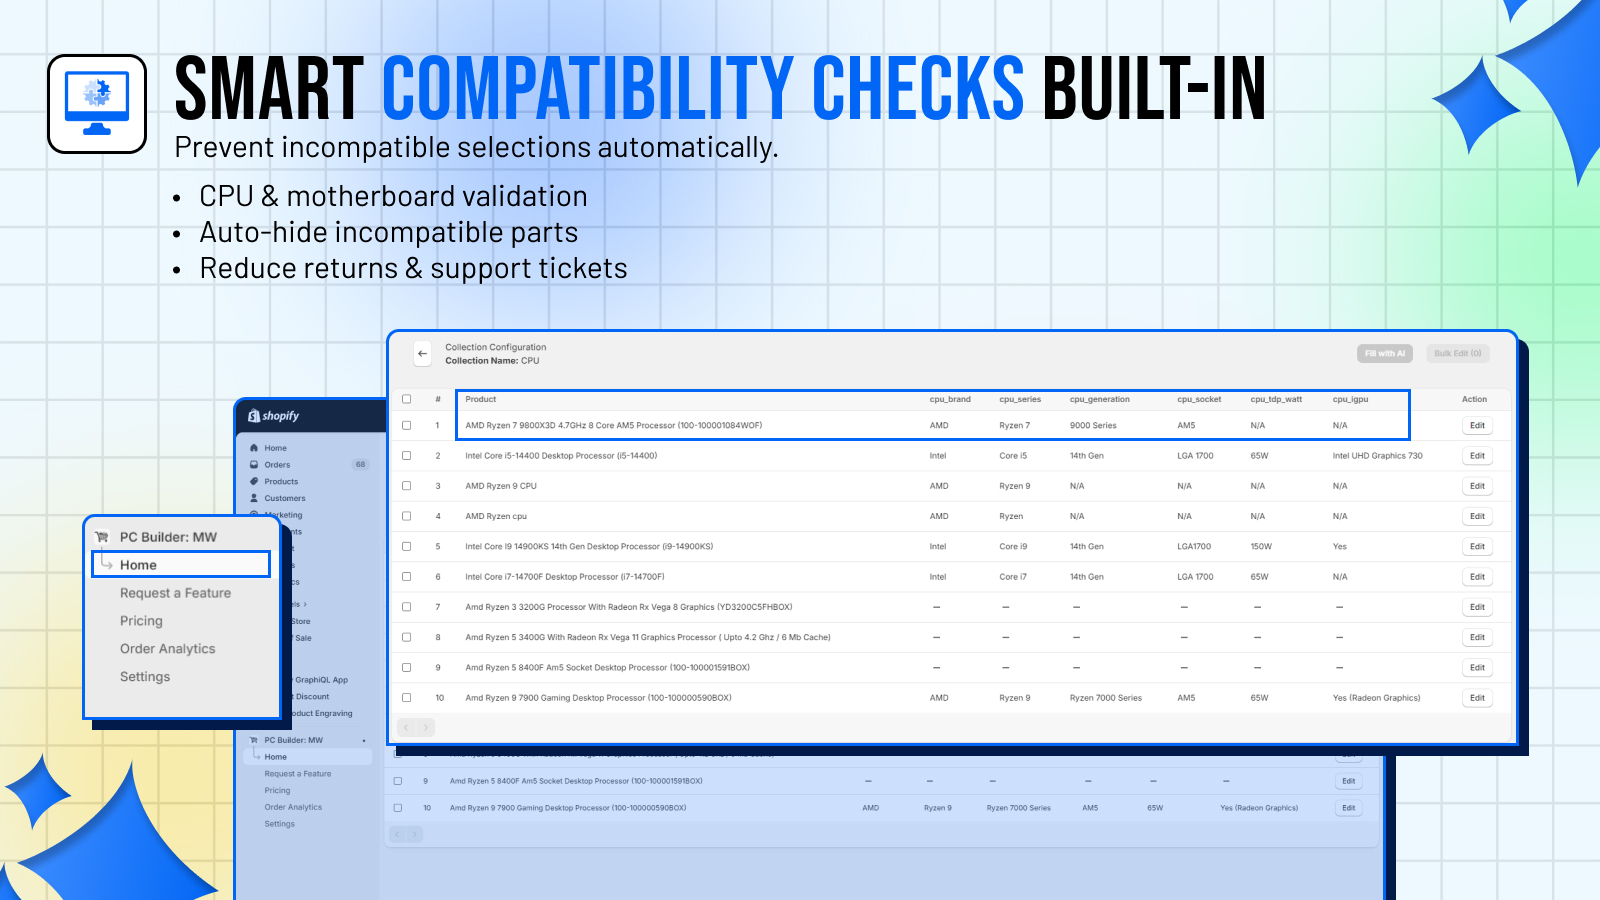
Step 5: Configure Compatibility Rules
The compatibility engine is what sets PC Builder MW apart. You can define rules like:
- "AMD Ryzen CPUs only work with AM4/AM5 socket motherboards"
- "DDR5 RAM requires a DDR5-compatible motherboard"
- "This PSU only supports cases with ATX form factor"
When a customer selects an incompatible combination, they see a clear warning — preventing bad builds and reducing support tickets.
Step 6: Embed on Your Store
Once your widget is configured, click Add to Theme. This adds the PC Builder section block to your Shopify theme editor. Drag it onto any page — your homepage, a dedicated "Build Your PC" page, or a collection page.
The widget is fully responsive and loads lazily — zero impact on your store's page speed.
You're Live!
That's it. Your customers can now configure their perfect PC, see compatibility checks in real-time, and add the full build to cart in one click.
Tips for Getting the Most Out of PC Builder MW
Create pre-built templates — Add suggested builds (budget, mid-range, enthusiast) as starting points for customers who don't know where to begin.
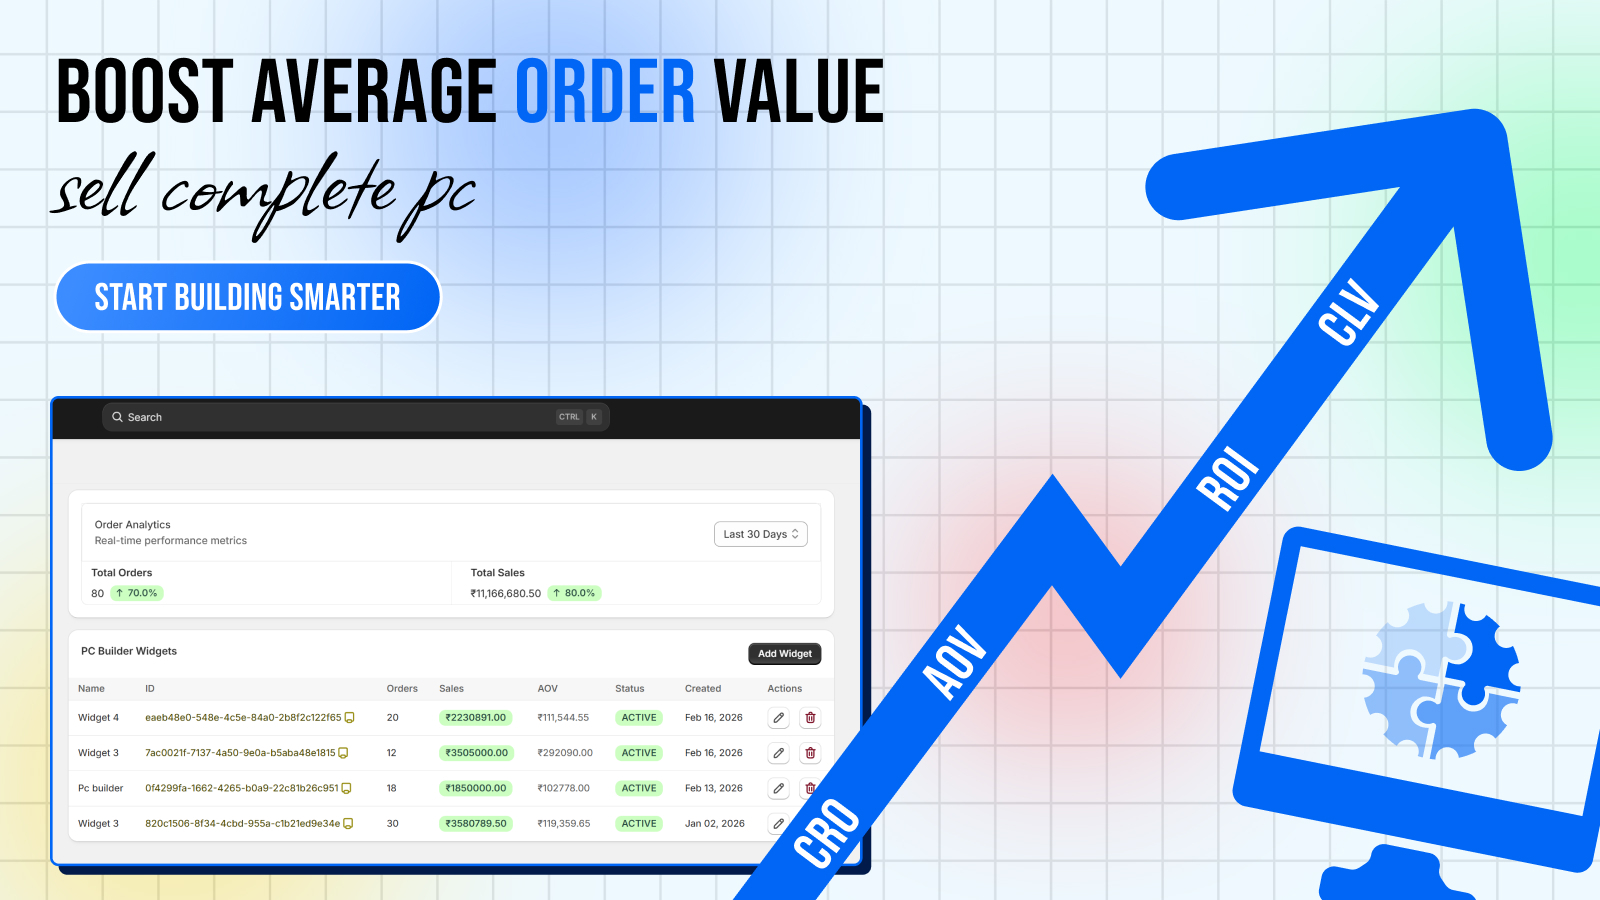
Use the analytics dashboard — Check which components customers pick most, which steps have the highest drop-off, and which builds convert best. This data is gold for your inventory and marketing decisions.
Enable PDF download — Customers can download their build summary as a PDF. This is great for B2B customers who need to get approval before ordering.
Promote on social — Every build gets a shareable URL. Encourage customers to share their builds on Reddit's r/buildapc or PC gaming communities.
Next Steps
- [Explore all features](/features)
- [See pricing plans](/pricing)
- [View support documentation](/support)